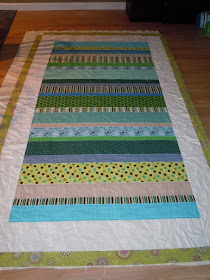
Step 4: Binding. I cut a 2.5 inch strips and machine stitched them together, long enough to go around my entire quilt. You can always cut off any excess binding at the end, so better to have extra than not enough if you are nervous about it.
Take your 2.5 inch binding and iron it in half. You now have a folded 1.75 inch binding.
Attach your binding to your quilt. Do not start at a corner. Your binding should have your folded, ironed edge on the inside of the quilt (left side in this picture). My raw edges of the binding are matched up to the edge of my quilt and sewn with about a 1/4 inch seam.
As you reach the corner of your quilt, stop about 1/4 inch from the end. Cut thread and fold your binding into a triangle (see picture). Holding corner as you folded it, begin sewing down your next side of the quilt. Repeat on all four sides and corners.
Here is a better shot of the corner. Clip your corners carefully when you are done sewing so they lay a little better.
Here is my quilt with the binding sewn around the entire top of the quilt, using the machine.
For the back of the quilt, I used binding clips (they look like hair clips but are a bit different) to fold over the binding and hold it in place while I hand stitched it to the back. I used the same quilting thread, but doubled it so it's nice and strong.
Your corners will fold over nicely as well, thanks to the way you machine stitched it on on the front side.
Just FYI, here is another picture of the binding after you fold your triangle and continue machine stitching. It's a bit blurry, but you can see me holding up the folded triangle part.
All of my pictures were taken very hastily, I apologize. I was in a bit of a time crunch to get this done so I could do the hand stitch binding part in the car on the way to Grandma and Grandpa's house. There are some fabulous quilting tutorials out there, much better than mine. Google around if you are interested. These pictures are more for me so I don't forget what I have already learned. Visuals always help me retain information better.
Detail of machine quilted top.
Top of quilt and binding detail.
Back of quilt with hand stitched binding.
And for laughs, here is one attempt at me trying to get some pictures of the finished quilt at my mom's house. Someone kept getting in the way. I have about 20 pictures like this.
My youngest in the way again and my quilt holder peeking over the top. (and yes, my kid does have other shirts. He insists on wearing only one or two favorites for weeks at a time though).
A big thanks to Vickie (my instructor and hand model) while I made this quilt. There is NO WAY I would have gotten this thing put together without her. There is a "thank you" gift in the works for her, and no, it is not a quilt. She is much more competent than I in making her own quilts, and they are gorgeous.


No comments:
Post a Comment