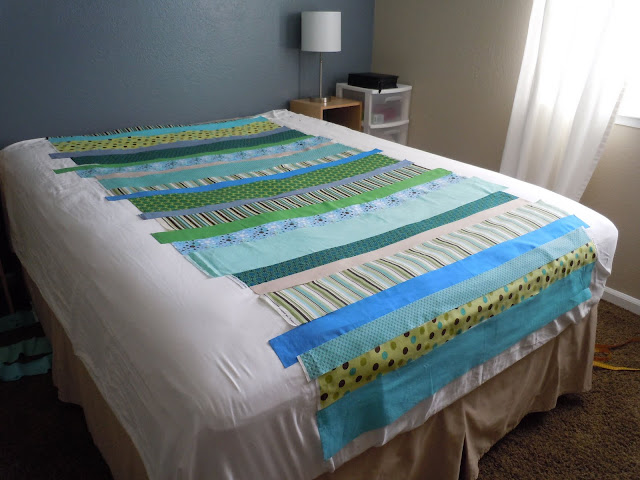
I finished it up over spring break week while visiting family. So nice to say I finally finished a quilt! Now, I get to make a matching one for the other bunk bed. A little difficult since my sewing machine is dead....but Mother's Day is coming up soon. A girl can hope, right?
Step 1: Make a quilt top. Make whatever quilt top you want in any size you want. I chose to do an easy strip quilt after falling in love with the quilts I saw HERE.
Pick out your fabric, cut your strips, lay them out and change your mind a million times until you like your design.
Sew those strips together. Iron and decide that you love it even if you would change a couple of spots, because you are NOT going to unpick it and start over. No.
A great tutorial HERE with detailed instructions on making a strip quilt top.
Cut selvage edges and make your strips nice and even. Not all bolts are created the same length.
I didn't want a border, but ended up adding one because my strips weren't long enough to cover the sides of the bed. I chose a soft, white muslin. I cut my border strips just long enough to cover the sides of the bed without having to tuck. For me, tucking blankets on a bunk bed is akin to squirting lemon juice in my eye. Actually, that's what started this whole process in the first place. (Hating the daily tucking of blankets on the bunk beds, not squirting lemon juice.) Now, all I have to do is spread the quilt out and the bed is made. My kids may actually be capable of making their own beds now. Once again, a girl can hope.
Step Two: Quilting. Now we are onto the actual quilting process. My backing was a soft, flat sheet that my boys love. Tape it to your floor, nice and tight. If you have a nice, big table, do it on that. I am not so fortunate, so the floor it was. Most people use quilt fabric for their backing too. I was cheap and used a flat sheet this time.
Lay down batting, and then your completed quilt top, centering on your bottom backing layer.
Step 3: Pin until you are cross eyed. This is a good time to pop in a movie or listen to an audio book. Save your aching fingers and pick yourself up one of THESE to close the safety pins. You can also use the handle of a spoon. I highly recommend curved safety pins as well. Pins need to be no further than 4 fingers apart, all over the quilt.
After basting (aka: pins all over quilt), cut excess batting and backing layers, removing tape as you go. You don't want to get right up against your quilt top when you cut yet. Leave a little excess on all sides for now.
Start quilting! Use a walking foot on your machine and use good, quality thread. I stitched straight lines on the strips and a triangle pattern on the border. For the sake of my sanity, I kept it really simple my first time around.
After all quilting is done, remove all pins and cut excess backing and batting with a sharp pair of scissors, so it matches your quilt top.
Next step: Binding. Stay tuned.


1 comment:
Beautiful and impressive! Quite the accomplishment - you should be very, very pleased!!
Post a Comment